

recipes
Overheard in the Wolfe House #326
Sam (after sitting down briefly in the easy chair, rises and returns to kitchen): That pizza’s gotta cook. I’m hungry.
The Power of Parmesan Cheese
Sam was very young when he discovered that Parmesan cheese made almost anything taste better, and it became a thing in our family.
We would tell the wait staff at Olive Garden, for example, to please leave the twirling grater at our table, because they had other tables to tend to and they didn’t need to spend all their time grating cheese for us.
(Now, foodie friends, please don’t judge. We were thrilled that (1) Sam finally could not only tolerate but enjoy a dinner out with the family and (2) the kids were asking to order things beyond a hamburger and fries.)
When Sam was little, he had distressing vomiting episodes. The doctors were no help. He eventually whittled his food choices to cold breakfast cereal with milk, morning, noon and night.
After a few years, we stumbled on the power of Parmesan. For Sam, the cheese was a gateway to trying other foods. Parmesan helped restore a balanced diet for him, including vegetables and salads. We didn’t blink at the amount of Parmesan that flowed. We even bought a twirling grater. On our family vacation in Germany last summer, we came across cheese mongers selling massive wheels of Parmesan and we teased Sam, “dude, that’s what you need to buy for a souvenir.”
I used to liken his preference to the way some people think everything tastes better with a little ketchup or mustard. For Sam, it was Parmesan, and we figured that was that.
 Then along came Samin Nosrat and Salt Fat Acid Heat. In her Netflix series, she talked about the first time she was a guest at a traditional Thanksgiving dinner and how she found herself slathering the cranberry sauce on everything because the meal lacked the acid her palate craved.
In the episode in Italy, she spent considerable amount of time exploring how Parmesan cheese was made and what powerful things it can bring to a dish–fat, acid, salt. She told viewers that good Parmesan should be among your kitchen staples.
No worries, Samin. We got a big check mark on that one in the kitchen at Chez Wolfe.
Making of a recipe (Raspberry Scones)
When I stop to think how far Sam has come, not just since he was a child, but even his first few semesters of college, I am awed. During these past 10 years of adult life, he’s met tough challenges head on and showed that he can think on his feet. He does so well that I sometimes forget the creative problem-solving skills that flow so easily through the rest of the family aren’t really at his command.
Enter the raspberry scone challenge.
Sam really likes raspberries. Sam is also the family scone and kolache baker. We tried to adapt a peach scone recipe from one of our favorite baking cookbooks, The Pastry Queen. The raspberry scones were a mess. (But we still ate them.)
I had a flash. There was another recipe in the King Arthur Whole Grain Baking cookbook that had a cinnamon-stuffed scone. I told Sam we could mash the two recipes together to help our idea turn out.
It worked, but I made the mistake of not communicating out loud and in advance which steps would come from which recipe. Sam retreated to the laundry room several times during the creation of these beauties to talk himself out of being upset with me (which I appreciate).
I don’t have the explanatory gifts of Julia Child, nor the exacting thoroughness of Coach In the Kitchen.
But as you can see, they turned out great. And Sam is happy to share his recipe.
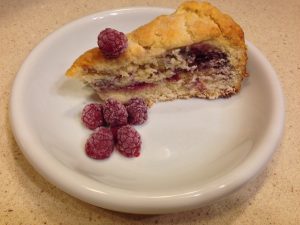
Raspberry scone
Raspberry scones
Equipment: a 9-inch springform pan
6 cups flour
1 1/4 cups sugar
1/4 cup baking powder
1/4 teaspoon salt
1 1/2 cups cold unsalted butter, cut into bits
2 cups buttermilk
3/4 cup raspberry jam
1 cup frozen raspberries
Preheat the oven to 375 degrees. Grease the pan. Stir flour, sugar, powder and salt together. Cut in butter until mixture is crumbly. Fold in buttermilk and stir lightly until it forms a ball. Pat down and fold over once. Divide the ball in half and pat into two discs that fit the pan. Put one dough disc on the bottom, spread with jam and top with berries. Top with the other disc of dough. Cut into 16 wedges. Bake for 40 minutes until knife inserted in center comes out clean. You can brush with milk and sprinkle sugar, if you’d like. Let cool for ten minutes before releasing the side of the pan. Serve warm.
Overheard in the Wolfe House #306
Peggy: I’m making orange chicken for dinner.
Sam: Oh, yeah. (smiling) Your orange chicken is better than Mr. Chopsticks.
Peggy: That is such a nice thing to say. Thank you, Sam.
Beef stew
There is an empty bottle of soy sauce, encased in a koozy, standing on the half wall between my cubicle and that of my longtime co-worker, Bj Lewis. Bj used to eat a lot of mandarin oranges. When he calls in his hamburger order for carry-out, he always has them put Swiss cheese on it. He doesn’t like chocolate. He never eats donuts when someone brings a dozen to the newsroom. He gets really cranky when election night dinner is pizza. (And we are always grateful when it’s barbecue instead.)
So, when Bj and his family had the kind of heavy/heady stuff going on that you just have to bring them a covered dish, a salad and dessert, this is what I made.
My mom took an Asian-style cooking class at Fox Valley Tech in 1976. This stew is a little easier than boeuf bourguignon, and just as tender and flavorful.
Braised Soy Sauce Beef
2 lbs. boneless chuck roast
1 T. soy sauce
2 T. sherry
1/2 tsp. salt
1 T. cornstarch
2 T. oil
2 scallions, cut into 2-inch sections
4 thin slices of ginger root
1/2 tsp. star anise
2 T. soy sauce
1 T. sugar
1 cup water
Trim the beef and cut into 1-inch cubes. Marinate in soy sauce, sherry, salt and cornstarch for 10-15 minutes.
Heat a dutch oven until very hot, add oil, brown half the beef over moderate heat. Stir to seal on all sides. Remove from pan, repeat with remaining beef.
Return the beef to the pot, add scallions, ginger, anise, sugar, soy sauce and water. Mix and bring to a boil. Reduce heat to low and simmer, stirring occasionally, for 1 1/2 hours until meat is tender and about 3/4 cup of liquid is left. Watch the liquid level and add more water if needed.
Remove the star anise before serving over rice.
If desired, add two or three carrots that you have trimmed and cut on the diagonal in about 1-inch slices during the last 20 minutes of cooking.
Cake in a jar
The first time I ever had cake in a jar was in Tokyo. The people who would become my friends and colleagues were kind enough to stock my apartment refrigerator when I first moved in. They filled it with things they thought a Westerner would like to eat. At the time, I had no idea what half the stuff was, but it was all delicious.
The first little cake in a jar was a revelation. It was so moist and flavorful, I didn’t miss the icing at all. I hunted in the fridge for a second jar and was thrilled to find it.
After I moved back home, I spent many years trying to replicate other delicious dishes I had there — shabu shabu, yakitori, tonkatsu, sushi — at home. (Honestly, the hunt has never ended.) It wasn’t until nearly a decade later, when a friend handed out little cakes in a jar as Christmas gifts, that I remembered those little cakes from my first days in Japan. She shared her recipes, which came from the Cookbook Cupboard in Austin.
Paige helped me make a pile of little cakes last weekend so I could bring them to work to help us get through election night. (She asked whether it was possible to make up your own mixes and skip the boxes. Yes, I had done that in the past and it does improve the recipe. But more on that later.) The original recipe calls for the cakes to be baked in pint jars, but if you want to do a single serving, put them in half-pint jars. The amaretto cakes will cook up a little faster, but the kahlua cakes still take nearly an hour.
Amaretto Cake
1 box of classic white cake mix
1 small box of vanilla pudding
1 cup of canola oil
4 eggs
1/2 cup water
3/4 cup amaretto
Kahlua Cake
1 box of classic yellow cake mix
1 small box of chocolate pudding
1 cup of canola oil
4 eggs
1/2 cup water
3/4 cup kahlua
Directions for both:
Whisk cake and pudding mix in a large bowl, add remaining ingredients and beat well for several minutes. Fill greased jars about 2/3 and bake at 325 F. for about 45 minutes.
Place lids and rims on the hot jars. If storing for more than a day or two, keep refrigerated.
Hard Sauce
The holidays are done and with it, for the most part, the obligation to eat all the things that come out only around the holidays. Our neighbors, an older couple, seemed to think our place was a good place to dispatch the rest of a home-baked cake gifted to them that was more than they could hope to eat.
It was a nice little cake. But I took one look at what was left and knew even the entire Wolfe pack wasn’t going to be able to finish it. It had dried fruits and tree nuts. The middle child is allergic to tree nuts. It wasn’t going to keep well either, the way a proper fruitcake would, because it hadn’t been soaked in bourbon, or brandy, or rum.
(This, by the way, is the problem with nearly every commercial fruitcake. Don’t these bakers know the ONLY way to make a proper fruitcake is to bathe it in booze once a week for at least six weeks?)
That meant I was going to have to take it to work. Just for fun, I made a hard sauce to go with. I didn’t want to put out any kind of memo about the sauce — after all, it reeked of bourbon — but I explained over and over how one might want to warm the cake, and then put a dollop on, and then it would come a little closer to a proper fruitcake. Or maybe make the cake a bit more like bread pudding.
Two of us took home the extra hard sauce. One of the editors on the night desk said he added it to hot chocolate and that was pretty good. I took a bit, too, and left it with the chocolate pound cake we made for Aunt Regina and her 94th birthday. It does appear that Hard Sauce goes with everything.
Hard Sauce
1/2 cup butter, left at room temperature for a few hours until very soft
1 cup confectioner’s sugar, sifted
2 T. bourbon
Beat the butter and sugar until light and fluffy. Fold in the bourbon until incorporated. Chill until firm. Put a heaping tablespoon on a warm dessert, and let it melt in.
Macaroni and cheese. At last.
When the kids were little, we did our best to feed them wholesome foods made from scratch. But we weren’t rigid about it either. We made one tough rule when we recognized what a Happy Meal could do to your kid’s metabolism.
I used to juggle time at work to be able to take Michael, when he was about 10 years old, to tae kwon do after school. He would beg me on the way home for a snack. There was a 20 minute drive ahead. The McDonald’s drive-thru was two blocks away, so we’d pick up a Happy Meal. Since it didn’t spoil his appetite, I didn’t think there was any harm. However, after about two months of that routine — with two-three Happy Meals a week — I saw a little paunch growing around his belly. I figured out a way to bring Michael a healthy, filling snack for after tae kwon do. And I told Mark I was concerned how fast that change came on.
We decided that the kids could no longer have fast food. To make it up to them, we would make hamburgers and fries once a week.
It was a production, but that’s also when we always had venison in the freezer. We had a bread machine, so that gave me a leg up to make hamburger buns every weekend. On hamburger-and-fries day, we’d cut about 3 pounds of potatoes into sticks and soak them in cold water so they would come out extra crispy. Mark would fire up the grill for the burgers and the turkey frier for the fries, no matter how cold it was outside. I’d run a large paper grocery bag in the microwave for a minute to sterilize it … that’s how we drained all those fries.
It was a great meal and the kids didn’t seem to miss out on fast food.
That routine gave me hope that we could quit mac-and-cheese from a box. I worked hard one Saturday to prepare it from scratch. Oh, how they complained. It didn’t taste right. It was the wrong color. It felt funny in your mouth. I was sorry I made so much, but, of course, the dogs weren’t.
For Thanksgiving this year, I decided to make macaroni and cheese. It had been more than 10 years since my last attempt. I was nervous. I knew Sam wouldn’t like it. He hated mac-and-cheese when it came out of a box. He says cheddar cheese is too “dactyl.”
(Paige and I think he’s invented his own word that mixes meter — a la waltz, long-short-short — with “tactile,” which does not bode well for cheddar cheese’s reputation.)
I knew Aunt Regina would like the mac-and-cheese I made. I knew I would like it. I knew Gus would like it.
I was bold. I made 8 servings. Michael took one bite and said “well, this won’t last the day.”
I had big plans to make leftover hot turkey sandwiches, panini-style, with green apple, bacon and bits of that mac-and-cheese. That didn’t happen. Yes, internet people, this is the one.
Mac and Cheese
1 pound macaroni
2 cups bread crumbs
6 tablespoons of butter, divided
3 tablespoons of flour
1 cup cream
2 1/4 cups milk
1 1/2 tsp. dry mustard
salt, pepper
8 ounces extra-sharp cheddar grated
4 ounces parmesan, grated
4 ounces Swiss cheese, grated
Preheat oven to 350 degrees. Grease a 9×12 casserole dish. Bring a large pot of salted water to boil and cook the macaroni al dente. Drain and return to pot to help it stay warm. Melt 3 T. of the butter and pour over the bread crumbs in a bowl. Grab a handful of the Parmesean and mix together with the breadcrumbs. Set aside. Melt the other 3 T. of butter in a sauce pan, stir in the flour and make a brown roux. Meanwhile, have the milk and cream heating in another pan (but don’t let it get hot enough to get a skin on it.) Slowly add the milk, cream and mustard to the roux and cook until nicely thickened. Stir in all the cheeses, salt and pepper to taste. Pour the cheese sauce over the noodles and gently fold to incorporate. Pour into the casserole and dust the breadcrumbs over the top. Cook for 20-25 minutes until bubbling throughout and brown on top.
Sangria and The Loser (with homemade falernum)
Here are some cocktail recipes my co-workers helped me taste test, here at the house, on a recent Saturday night, playing Cards Against Humanity.
We’re good people. Really we are.
I didn’t set out for the party to have a cocktails-with-a-literary-twist Tequila Mockingbird theme, but it did. I think that’s because we writers enjoy a good drink.
We’ve done this before, except mixing up old-fashioneds because that’s what Don Draper did.
We tried out recipes I found in the newspaper. I clipped a page from the Denton Record-Chronicle years ago and kept it because it had recipes for saffron cocktail onions and preserved cherries and tiki drinks that needed falernum.
It’s hard to find falernum. Charles Dickens described it in his literary magazine, All the Year Round, as “a curious liqueur composed from rum and lime-juice.”
I made some and we used it to mix up Losers, which was barkeep Todd Thrasher’s take on the rum swizzle.
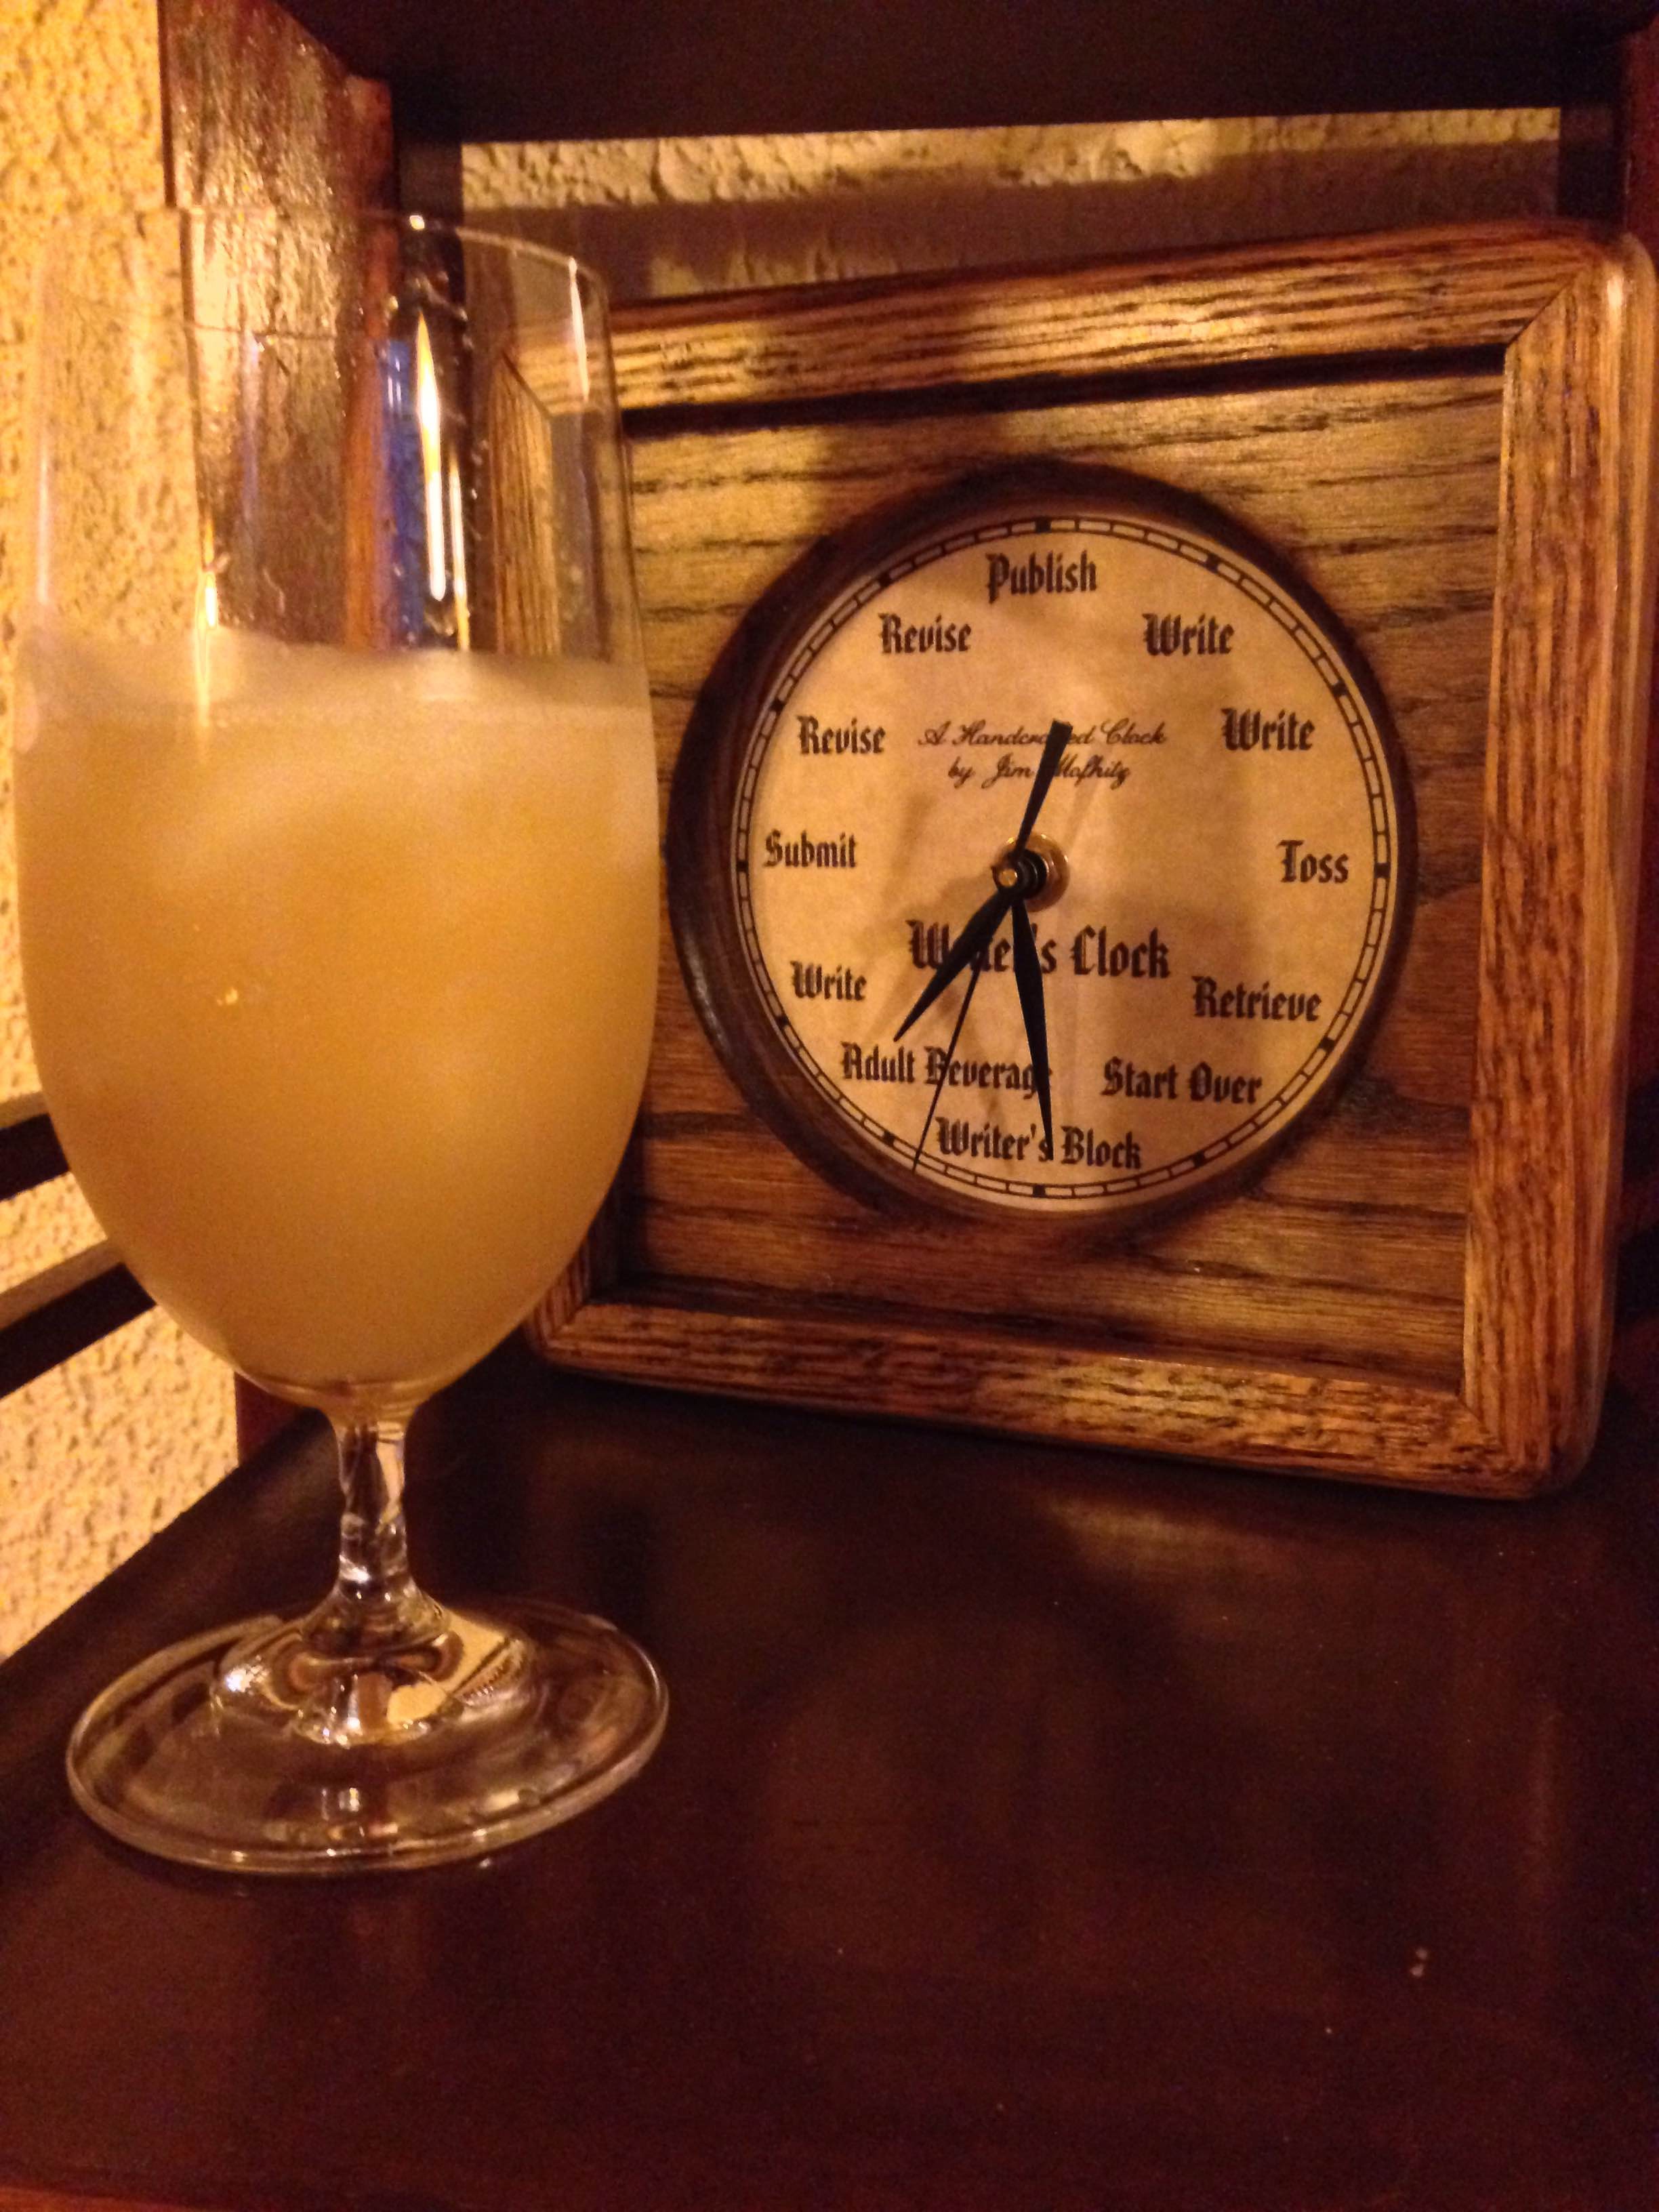
A glass of The Loser being served during the Adult Beverage Hour of the Writer’s Clock.
And we downed a pitcher of some of the best sangria I’ve ever had, my-and-my-daughter’s take on a recipe in The Guardian.
Falernum
10 limes (organic, you’re going to use the peel)
10 whole cloves
5 whole unsalted almonds
1 tsp. sugar
1 liter white rum
Peel the limes, taking care to cut away any of the white pith. Combine the peels with the cloves, almond, sugar and rum in a large glass container. Store, loosely covered, in a sunny place for three days, strain and discard the solids. Pour the liquid into a jar or bottle and cover. Store at room temperature.
(You can juice the limes and save it for another use … such as mixing up Losers.)
The Loser
1/2 ounce falernum
1 ounce dark rum
1/2 ounce fresh lime juice
3 ounces pineapple juice
Ice, pineapple slice (optional)
Fill a highball glass with ice. Add falernum, rum and juices. Pour into cocktail shaker and back into the glass (because, like Bond’s martinis, this cocktail is better shaken, not stirred). Garnish with a slice of pineapple, if desired.
Sangria
1 orange (organic)
1 bottle red wine
1 bottle pink m0scato
1/4 cup brandy
1/4 cup madeira
1 cup sugar
1 cup water
About 1/2 cup orange juice
Slice the orange thinly and muddle in the bottom of a large ceramic pitcher. Open the wines and pour in the pitcher with the brandy and madeira. Chill for a day. About an hour before serving, combine sugar and water in a small saucepan and heat until the sugar is dissolved. Let cool slightly and then pour into a large pyrex glass measuring cup (at least two-cup size). Add enough orange juice to reach 2 cups and then combine with wines in the pitcher. Add several cups of ice before serving.
Summer Slushie
So refreshing! My dad made these for us once years ago. When I realized I had both strawberries and watermelon in the kitchen, I tried to remember what he did. After I was finished, I recalled that he tossed in a few ice cubes to help the blender along, but I didn’t do that today.
(When you have fruit this way — so concentrated — its doubly important that you use organically grown.)
Summer Slushie
1 quart strawberries
1/2 small seedless watermelon
1 T. sugar (optional)Top the strawberries and rinse lightly. Place on a cookie sheet and freeze for at least 2 hours.
Remove from freezer and let thaw slightly as you cut the watermelon in chunks. Put both in blender and pulse until a smooth slush. Taste and sweeten with more sugar, if desired.
Serves 4.